SnowyStarIH (talk | contribs) m (→Boss Monsters) |
|||
| Line 124: | Line 124: | ||
|experience=32500 |
|experience=32500 |
||
|gold=0 |
|gold=0 |
||
| − | |droppedItem={{9i|item}} Yggdrasil |
+ | |droppedItem={{9i|item}} Yggdrasil leaf (100%) |
|skills= |
|skills= |
||
|spells= |
|spells= |
||
| Line 132: | Line 132: | ||
|locations=[[Realm of the Mighty]] - L9 |
|locations=[[Realm of the Mighty]] - L9 |
||
}} |
}} |
||
| + | |||
====Final Boss: Corvus 2<sup>nd</sup> form==== |
====Final Boss: Corvus 2<sup>nd</sup> form==== |
||
{{Enemy |
{{Enemy |
||
Revision as of 20:38, 19 August 2010
The Realm of the Mighty is the final "storymode" dungeon in Dragon Quest IX. Palace of the Mighty is located on the top of the it.
It is an evil transformed version of the Realm of the Almighty.
The Realm of the Mighty can be returned to after finishing the storymode of Dragon Quest IX. One must go to the Realm of the Almighty and speak with Celestria; she will then be able to transport the player to the dungeon.
Some of the most powerful monsters, barring those exclusive to grottoes, in the game appear in the Realm of the Mighty, so it is advised that the player and his or her party be equipped and well-trained prior to venturing towards the initial story's final battle.
Monsters in the Area
| Dragon Quest IX (DS) | ||||
|---|---|---|---|---|
| Enemy | Gold | Exp | Drop Item | |
| #185 Mandrake marshal | 140 G | 2200 | 1/64 1/128 | |
| #188 King crab | 146 G | 2800 | 1/16 1/128 | |
| #189 Genie sanguini | 96 G | 1260 | 1/64 1/128 | |
| #190 Cumulus vex | 178 G | 2300 | 1/16 1/256 | |
| #191 Red dragon | 98 G | 3000 | 1/16 1/128 | |
| #192 Gigantes | 110 G | 3200 | 1/64 1/128 | |
| #193 Belisha beakon | 104 G | 1460 | 1/32 1/128 | |
| #194 Charmour | 192 G | 2450 | 1/32 1/128 | |
| #195 Cureslime | 167 G | 1350 | 1/16 1/64 | |
| #196 Great troll | 78 G | 3800 | 1/32 1/128 | |
| #197 Cobra cardinal | 184 G | 2180 | 1/128 1/256 | |
| #198 Prism peacock | 168 G | 2300 | 1/32 1/256 | |
| #199 Night knight | 182 G | 2980 | 1/64 1/256 | |
| #200 Drakulard | 152 G | 3450 | 1/16 1/128 | |
| #201 Barbatos | 187 G | 3400 | 1/16 1/128 | |
| #202 Firn fiend | 172 G | 3200 | 1/16 1/256 | |
| #203 Sick trigertaur | 195 G | 3600 | 1/16 1/128 | |
Boss Monsters
Mini Boss: Goreham-Hogg
| #270 - Goreham-Hogg Beast Family | |||||
| File:GorehamHogg.png | HP | MP | Attack | Defence | Agility |
| 2470 | 40 | 196 | 192 | 130 | |
| Exp | Gold | Drop | |||
| 17500 | 3350 G | ||||
| Description: Mini-boss, pretty much the same as it was except its HP is doubled, Attack and Agility is a little less, and give more reward after its defeat.
| |||||
Mini Boss: Hootingham-Gore
| #271 - Hootingham-Gore Bird Family | |||||
| File:HootinghamGore.png | HP | MP | Attack | Defence | Agility |
| 1854 | 255 | 125 | 238 | 148 | |
| Exp | Gold | Drop | |||
| 18500 | 4050 G | ||||
| Description: Mini-boss, pretty much the same as it was except its HP is more, Agility is a little less, and give more reward after its defeat.
| |||||
Mini Boss: Goresby-Purrvis
| #272 - Goresby-Purrvis Beast Family | |||||
| File:Goresby-Purrvis.png | HP | MP | Attack | Defence | Agility |
| 2306 | 25 | 220 | 256 | 162 | |
| Exp | Gold | Drop | |||
| 4550 | 20000 G | ||||
| Description: Mini-boss, many of its attributes are weaker than it was, except its HP is double and he gives a better reward after its defeat.
| |||||
Boss: Corvus
Boss: Barbarus
Final Boss: Corvus 2nd form
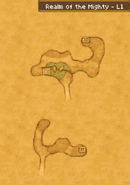
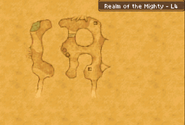
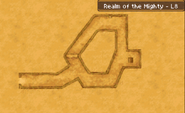
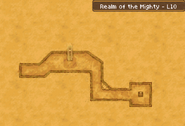
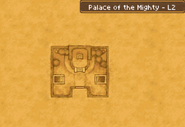
Layout
| This article is a stub. Please help Dragon Quest Wiki by expanding it. |
| Dragon Quest IX | |
|---|---|
| Characters | |
| Regions |
|
| Towns, villages and places | |
| Dungeons | |
| Races | |
| Key terms | |
| Treasure maps | |
| Lists | |
| Other | |


